I was born in and lived in Delhi, India till 1999 when I came to the USA – ostensibly for a Masters in Industrial Design. But here’s the dirty truth- I came because of the sound of a Harley Davidson. Saw one once in Delhi, long ago. I heard it start up and rumble away, wet myself publicly and resolved that one day, I would visit their homeland.
That didn’t seem likely at the time I was studying architecture in Delhi so the next best thing was to see what I could do with my Bullet, dearly loved as the only real motorcycle available in India back then (and perhaps even now). Thats when the idea was sort of baked into my brain, in the heat of 115 degree Delhi summers, over cigarettes, the smell of steaming cow dung and chats with biking buddies in the college cafeteria. I would build a V twin Enfield- it should feel right, with its long stroke, heavy flywheel, beautiful cylinder and head. Looked for any and every book I could find on vintage motorcycles, V twins, engine design, metal casting, machining- all of it. Bought an old enfield engine to use as reference.
Jump ahead to 2002. I did in fact find myself in the USA, now an industrial design faculty member at an art and design college. On a trip to Delhi in 03, I picked up my old engine and brought it back. Began to work on the idea on weekends, sketching, 3d computer modeling, measuring all internal parts, figuring out how to make the whole thing work using only standard enfield parts. You guessed it – came across the Norcroft V twin Enfield online, sort of destroyed me for a week. Then I figured, this is sort of fun anyway, so lets keep at it. I guess a couple more years passed, about 18 developments of my CAD model later, I was ready to start building patterns, and then, what do you know, the Carberry comes to my attention! By now, I was beginning to suspect that my next door neighbors were working on an Enfield V twin as well. As you’d expect, after a month of depressed moping, it was back to the basement again and I also noticed that my approach was rather different anyway, so why not put forward the way I thought made sense to me? Here is my rationale:
1. Keep it as simple as the original Bullet engine. Therefore, no modern updates to major engine internals - it still has the stock tappets, no hydraulics, and the stock piston oil pumps. Vintage bike lovers really like to tinker and tappet adjustment is almost a religous ritual for many.
2. Improve the oil filter – I machined a new filter housing which uses a standard modern cartridge type filter available at Advance. This is not a screw on car type filter – that doesn’t look right, so I have a finned aluminum housing I made.
3. Aesthetically, and this was very important to me being an industrial designer- keep the “vintage” and “Enfield” cues strong. I thought I would pick up from the last Enfield big twin- the Interceptor. The rounded profile of the front of the crankcase and pleasingly smooth and gently radiused forms of the castings and the cooling fins on the side of the wet sump. A wet sump simplifies matters and also ties in with the last Enfield big twin- the Interceptor Mark 2, which also had a wet sump.
4. I love the external copper oil pipes that are such beautiful visual elements on vintage engines, so I decided to incorporate that as well. This also helps to keep the oil cool as it travels through them, exposed to the air.
5. Keep the frame mods to a minimum and again keep the “vintage” feel going by keeping the single down tube- the Enfield big twins of yore had single down tube frames and handled well. The look of the “vintage V twin” I think is the very simple and elegantly “cradled” engine between two tubes- front sloping forward and rear sloping back.
I ended up quitting my teaching job in '08, was getting the feeling that my heart was in projects like this. Since I wasn’t a machinist, I had to learn that too. This is where the stars lined up – a student’s family business is a machine shop close to my home, and his dad, Mr. Boggs was sufficiently amused by the project and my excitement to allow me to come in and start working on my project.
Well, it took about a year for the machining to get done, I learned everything as I went along and here we are. I have skipped all the “oh darn!” moments but there weren’t too many, just one huge one, when the first foundry I went to pretty much destroyed my patterns built over 3 years by leaving them near an open window in the rain…still get stressed out when I think of that- had to cut away and repair the whole thing after a couple of months of very evil thoughts.
But…the holy rider in the sky must have smiled upon me because from the very first firing, it runs like it WANTS to! It starts first kick every time! It isn’t quite as explosive as my 750 Triumph Bonny, but it has the very mild Bullet cams and stock 7:1 compression and small carbs, so a healthy increase in output can be expected with the usual mods, retarding the intake cam one tooth is a notable method. But, the torque is really lovely- cleanly pulls top gear at around 20 mph (!!) and accelerates from there without any snatching! I’m keen to try the new 5 speed gearbox the new Enfields have – my old one has 1-2-3 really low and a huge gap to top. My final ratio is 4.22 to 1 right now and she feels like she could pull even taller.
The amazing part is that its SMOOTH! It shakes much less than my Triumph and I think less than my old 350 single engine! That second piston is really helping to cut the vibes.
The sound? Beyond my wildest dreams, from those baking hot summer days in Delhi, ten years ago.
After some strong interest from enthusiasts across the globe, it was inevitable that this mechanical up-lifter, picker-upper and good-vibe-giver be shared with others who like this type of elemental motorcycling. This precipitated the development of the new design, the 998, the progression and result of which can now be found in my blog entries over the last couple of years.
In February 2014, while working on my very first client-commissioned machine, I decided to focus my energies on this project full-time and make it that ever-present ball&chain...my job, my work, my livelihood. Whether it does in fact fulfill that requirement remains to be seen.
Here goes!
For a brief excerpt from the very beginning of the tale, the making of the original 700 engine, read on...
It took a long time. Lots of staring into space. Endless cups of tea. Miles Davis, Jeff Beck, Floyd with Barrett and Jethro Tull. Long breaks of utter despair with the burning question, "Why do this if you find halfway that it's already been done?" Don't have an answer but am I glad I stopped asking.
It took a long time. Lots of staring into space. Endless cups of tea. Miles Davis, Jeff Beck, Floyd with Barrett and Jethro Tull. Long breaks of utter despair with the burning question, "Why do this if you find halfway that it's already been done?" Don't have an answer but am I glad I stopped asking.
 1. Bought an old Bullet engine on a trip to Delhi. Brought it back in my checked baggage. This was late '03, post 9-11. To my great surprise, they didn't want to check me at D.C. The big lumps of metal in my suitcase would have gotten me into big trouble.
Measured and sketched every single part with a dial caliper. |
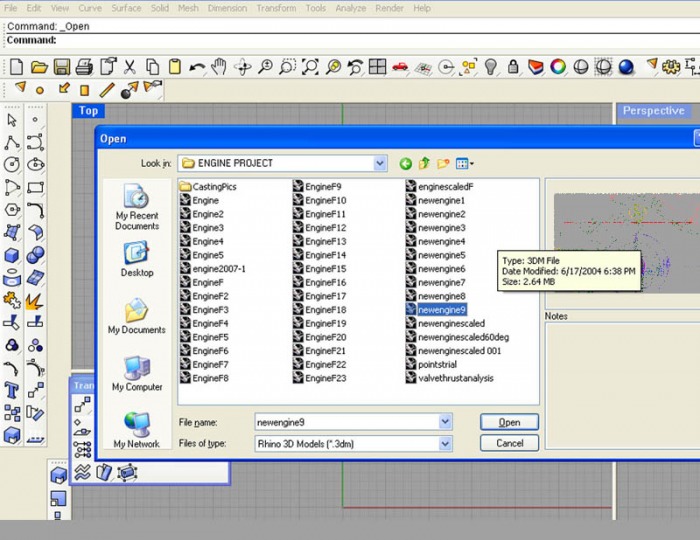
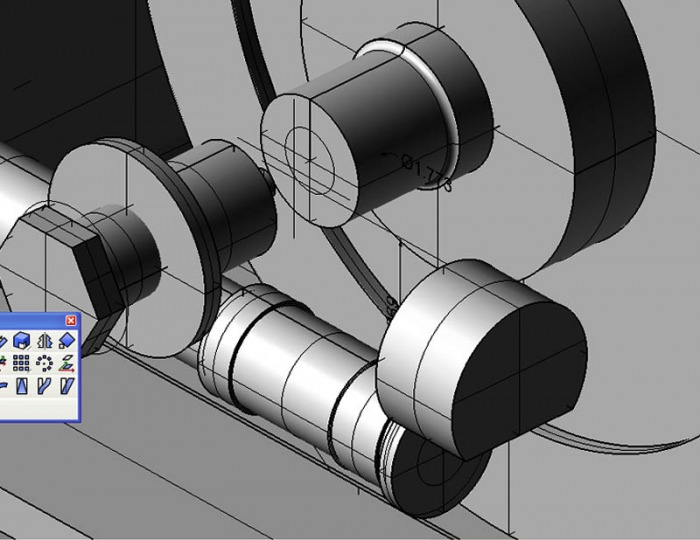 2. Next I modeled every single component in 3D CAD. I used Rhino3d, a user- friendly software used often by industrial designers. It was a puzzle to be solved- make two Bullet engines work in unison using standard parts. CAD allowed accuracy, easy changes and several approaches.
|
 3. This was the meat of the design stage- getting to the simplest, most practical and build-able solution. At this stage, I had no access to any machining setup, so had to assume that everything would be done on a simple manual mill and lathe. Counting all changes, had more than 40 CAD model stages before the final design.
|
 4. Once the final design was reached, I jumped into woodwork. The CAD model was scaled up in size to compensate for the shrinkage of the castings on cooling. Printed several drawings from my CAD model.
|
 5. I then used the drawings as templates to cut, carve, shape and sand blocks of glued up MDF. It's dimensionally stable, easily sandable and comes in sheets of precise thickness. This took a very long time as several things needed to be reconsidered once the design began its translation from ideas to an actual object.
|
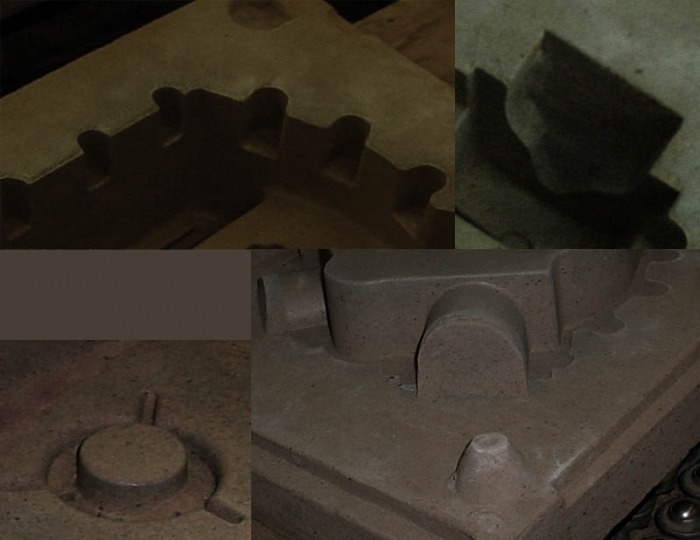
 6. Ruin. Destruction. Despair.Yes, these are my patterns- years of work- after they were left next to an open window during a rainy weekend by the genius at a small local foundry. The bottom portion of all 3 had swelled and split. I saw what had happened, picked them up and left right then. The furnace was on and had I stayed to chat, I just might have pushed him in.
|
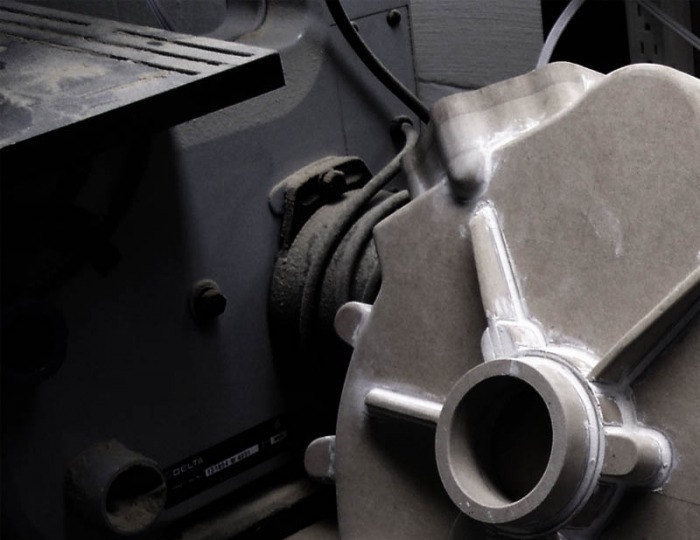
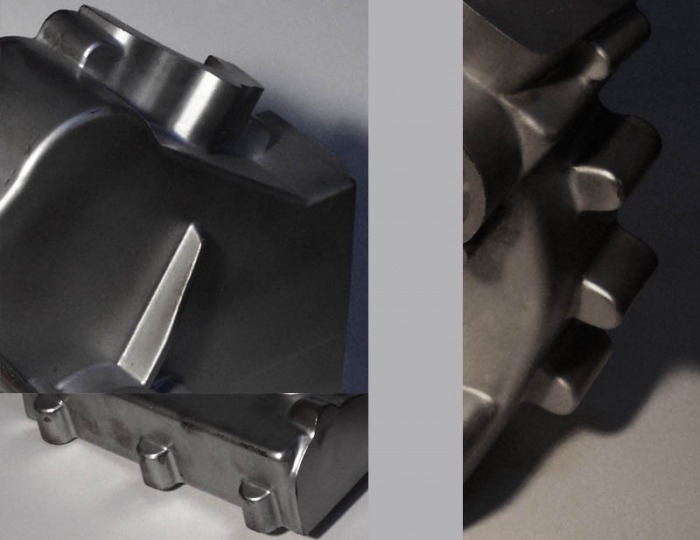 7. Ah well. 3 months later, I bit the bullet, got down to it and cut away all the damaged portions. Made all the necessary repairs and had them looking as good as they did before. Nothing was going to stop this engine now. If you're wondering about the silvery finish, its a waxy, slippery paint to ease removal of the pattern from the sand mold.
|
 8. One of the most exciting days of the project. The sand molds made from my patterns! Found a great foundry in Toledo (Seaport Mold). I got there at 8:30 am and by 4:00 pm, they had a beautiful set of castings ready. They even made an extra set of molds just in case. Needless to say, I had them pour that one too and I had 2 sets of castings in case I messed up.
|
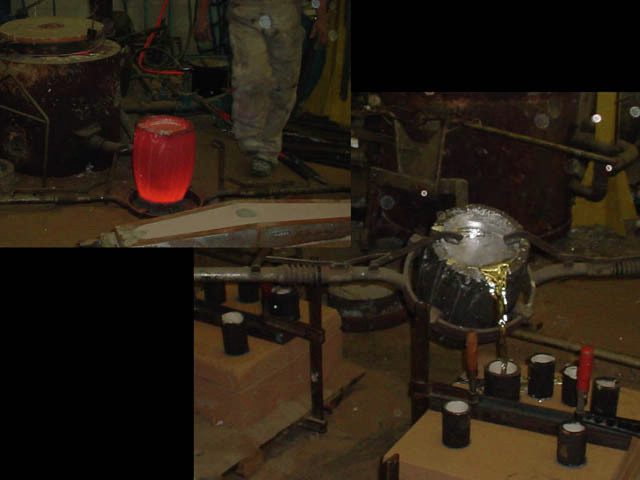 Here's a shot of the molten aluminium alloy being poured into the sand mold.
|
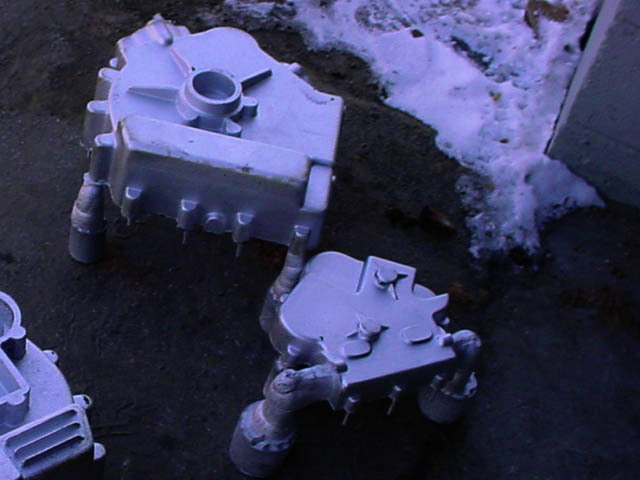 And out came the castings!
Indescribable joy. Years of work finally taking shape in metal. Got a bit wet eyed, sentimental that I am. |
